Two Cat Heads

Well, it’s been a long time since I posted anything.  Life happens.

Here are two baskets I made called cat heads.  I wish I had a picture of one upside down.  That’s the way you can really see the four corner points.  Looking at two points, they look similar to a cat’s head.  Makes sense, right?  You need an imagination.  lol

I always try to do something different with each one.  The green one in the rear has round reed starting half way up.  The rim is crisscrossed around with the stakes left cut off instead of the usual tucking in.

The blue in front has three rims stacked on top of each other.  I tied them with blue waxed linen rather than weaving with reed.

This type of basket can be any shape depending of the pressure put on as you are working upwards.  But interestingly,  this basket always starts with a six by six inch base.

Teaching

Market Basket

I’m going to be teaching how to make this market basket. Well, if people sign up, I’ll be teaching this class.

Although I think that beginners can weave this basket, it will be challenging to say the least. The weaving is a ’twill’ weave. A ’twill’ weave is any that is not a ‘simple’ over one, under one. This is a 2/2 weave meaning, of course, over two/under two.

The challenges come from, first the brain and secondly, from the eye.  The first row is easy.  Just weave over 2/ under 2 and end the row.  Knowing where to start the second row is the trick.  The weaver goes between the 2 stakes that had been gone over in the row before it.  Makes sense?  I bet not.  The brain kicks in and decides it does not like to go over/under 2.  Don’t ask me why.  It just doesn’t want to.

Now the eye kicks in.  Because the reed is spaced dyed (multi- colored) it is very hard to see the pattern going up to the left.  Such fun!  To make it a little harder I’ve changed the size of the reed at the top.

Once that’s done, rimming is a snap!  Can’t wait for class to start!

Combined Styles Handle

Japanese/Penland Style Basket

Japanese/Penland Style Basket

Handle -Side ViewHandle - Front ViewButterfly Knot - Top ViewButterfly Knot - Side View

I was asked by another blogger to explain how the handle of the basket was made. Foolishly, I only took the one photo and the basket has sold so I cannot show the handle from a better angle.

I took 3 pieces of flat reed and sandwiched them together. It is wrapped with 2 pieces of flat/oval reed in an “x” pattern up the two sides, leaving about 4″ empty at the top. Very simple.

The top Knot is called a “Butterfly” knot or “Japanese” knot. I have given you a top and side view (from another basket) but, please don’t ask me how to make it. Not so simple!

I hope this post helps a little in understanding the handle.

Mica Rim

Cat Head with Mica RimClose-Up This is the Large Cat Head basket I made in the class with Billie Ruth Sudduth.

I found this Mica cut into discs which fascinated me. Being Mica, they are very fragile but strong enough to handle and tie. I used purple waxed linen to tie them together and to the basket. I have collected rocks and minerals from the ground all of my life and I have some beautiful samples of Mica. I love the way it reflects light looking solid silver or translucent.

The cat head style basket is one of my favorites and I was pleased to find an attachment to do it justice.

Billie Ruth Sudduth Class

Clam Basket

Clam Basket

Bushel Basket

Bushel Basket

Appalachian Egg Basket

Appalachian Egg Basket

It’s high time I did some posting. I have been very lax. I was very fortunate to be able to take a class with one of North Carolina’s ‘Living Treasures’, Billie Ruth Sudduth. She taught a class at Penland School of Crafts last July and I was able to attend.

She is most notably known for her ‘Cat Head’ baskets, hence my interest. I learned to make them from one of her books. This class was for “Big” baskets and that they were.

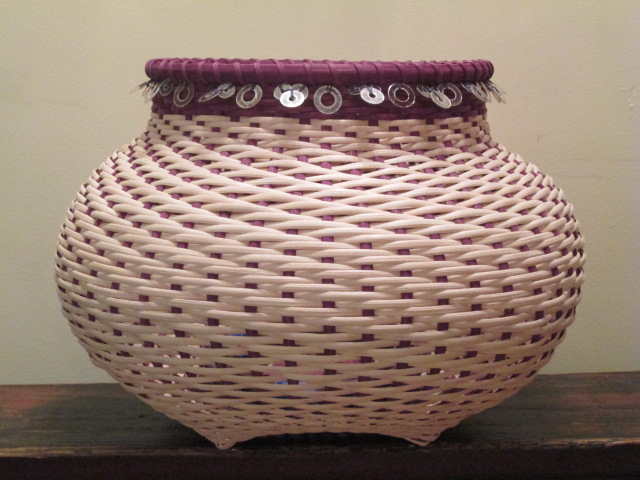
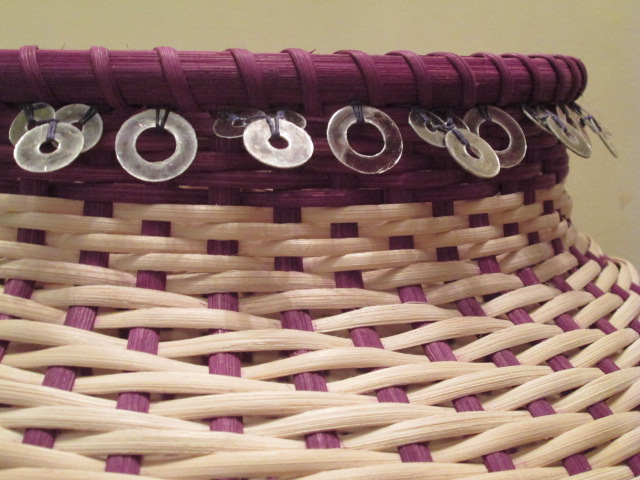
The extra large Calabash clam basket is 15″ in diameter. She named it after a tiny shrimping town on the southern coast of NC and the pattern is named for the bivalve clam. The Chevron pattern is a signature of the Chitimachas tribe of Indians from Louisiana.

This basket uses a ’twill’ weave which is any weave other than over one/under one. There are endless variations of twill weaves. This particular weave is over two/under one which creates an extremely strong basket.

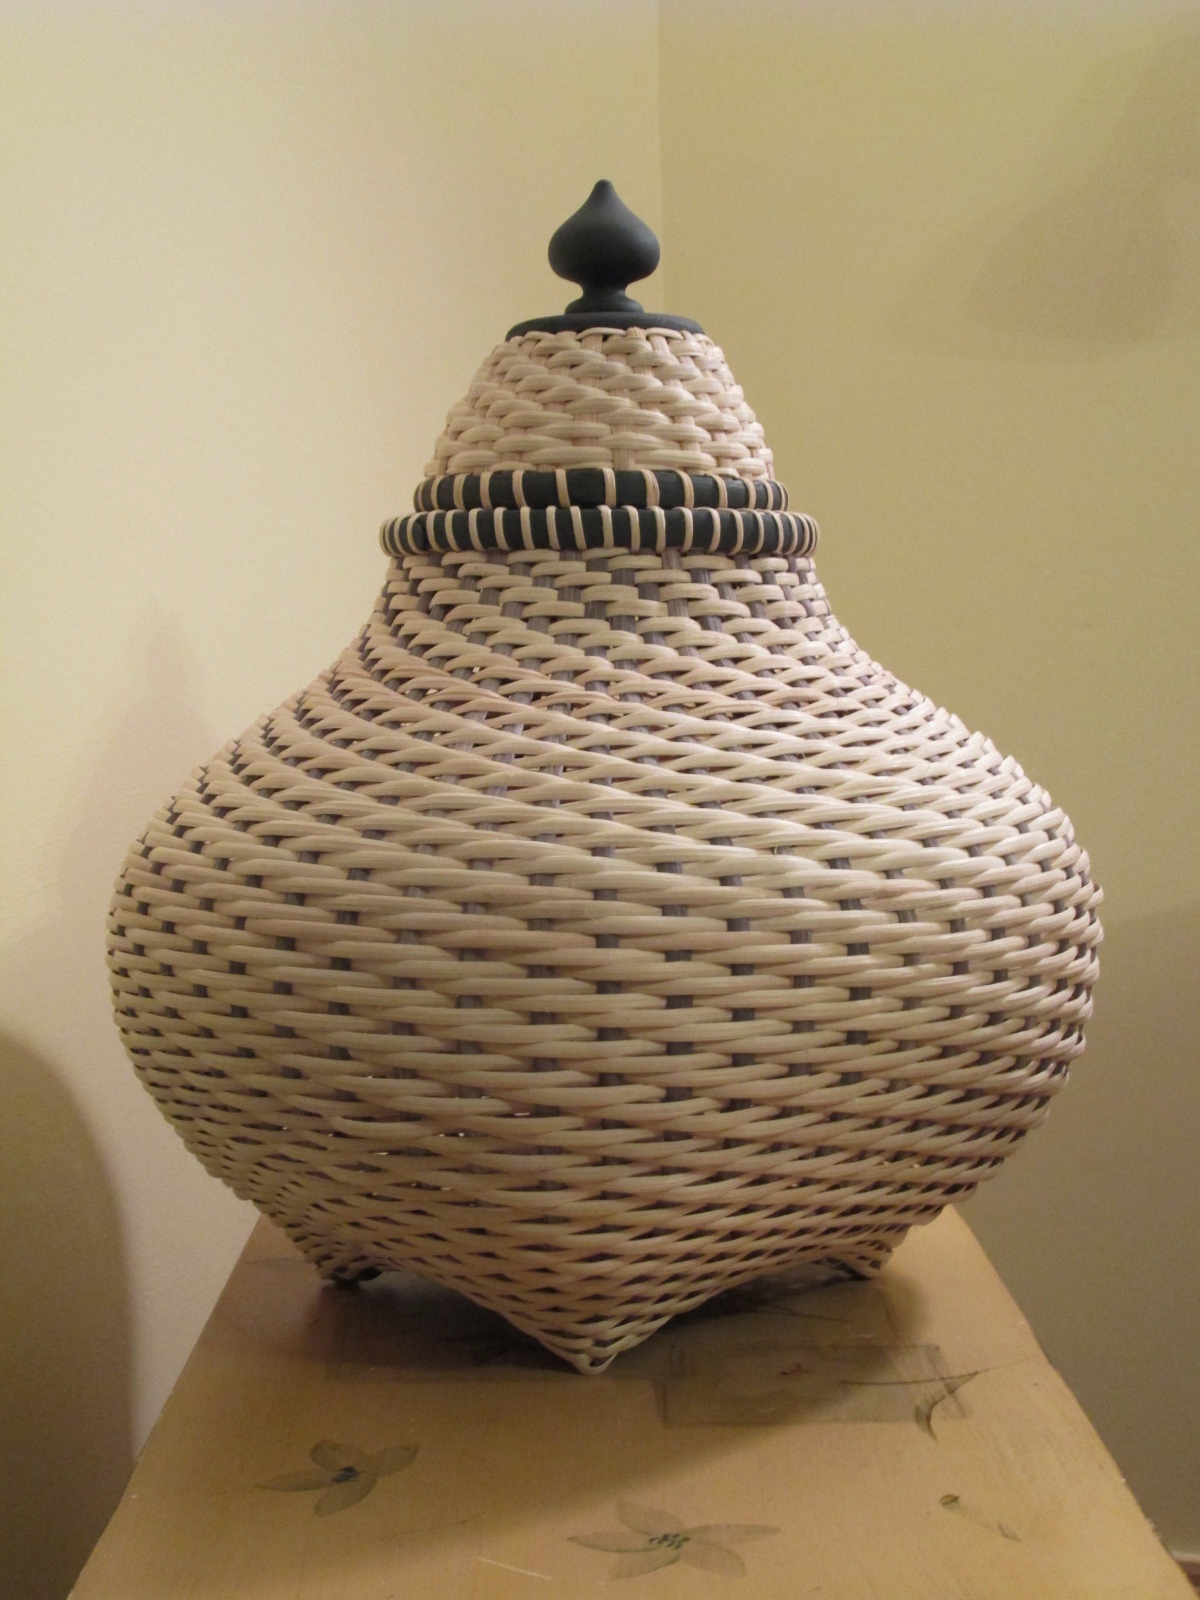
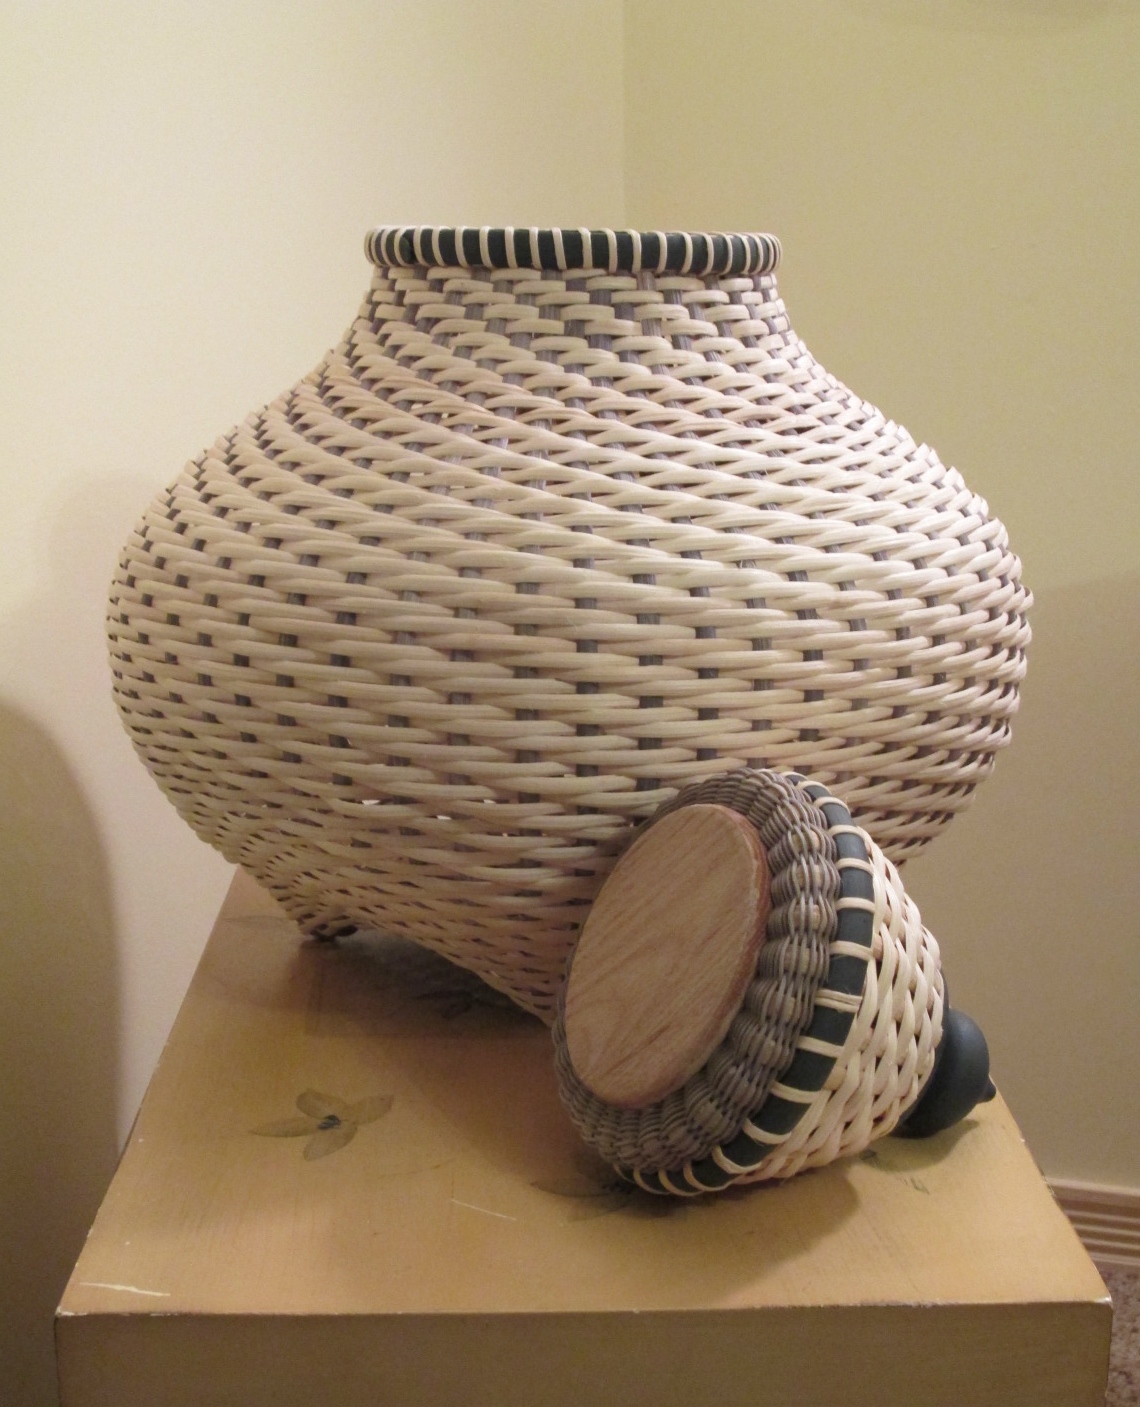
The Bushel basket is 19″ high with a 12″ top diameter. It has multiple colors and is a simple over one/under one weave. We hand dyed all of our reed in this class. The handles are hand carved oak. And, no, I did not carve them myself. Good Grief! I guess you could use this as a laundry basket.

The egg basket is 19″ wide and 14″ deep. I have never seen an egg basket this large. The lashing which holds the two hoops together on each side is called an “ear”. There are different kinds of lashing. The most common one is a “God’s Eye” is a four point lashing. The one used here is a three point lashing, most commonly used in Southern Appalachia. It is also known as “donkey ears”.

We also made a large ‘cat head’ basket. I have not finished the rim yet. I am trying something a little different on that and will post it separately soon.

First Checkerboard. Not!

Red, Gray & Natural

Red, Gray & Natural

This basket was the first checkerboard design I did. I got all the stakes in (the vertical strips), natural, gray, natural, gray, etc. When I went to get the gray weavers (the horizontal strips) I stopped in shock because I had no gray left. I mean, really? I didn’t dye enough strips? So, okay no problem, I’ll use red.

When I finished the second row of weavers (the horizontal strips) now I knew I had a problem. I’m still wondering where my brain went that day because I sat there and stared at the thing for 5 minutes. 5 minutes! When my brain came back from hiding I realized I used the weavers for the stakes. 2 colors in a checkerboard Lynn, 2 colors! All stakes one color and all weavers another. So simple.

The basket came out great but it’s sure NOT a checkboard!

Primitive Arts

Tobacco/Centerpiece

Tobacco/Centerpiece


I like the look of old, old baskets especially from the southern Appalachian mountain areas. Although my baskets don’t have an old look they give a hint of flavor of the old South. I guess they are considered to be primitive because they are so simply made and are over 100 years old. I should do some research are them.

The large square is a repro of the tobacco leaf drying basket. You can still find some in flea markets in the southern states. They were usually quite large; mine is only 14″ x 14″. It is the only basket that is stapled together as far as I know. I used 1″ flat reed and stained it a driftwood color. They are great to hang on a wall. Very graphic looking.

The other is simple centerpiece or mantle basket. It has a high handle (not sure why) and again I kept it very plain with as gray stain although a lot were painted. I’ll try that next.

Checkerboard Series

3 In A Series
I have been experimenting with larger sized reeds lately. The baskets above use both stakes & weavers of 3/4″ width. It has pros & cons. Larger is not easier to use as, say 1/2″ or 3/8″ but the basket weaves faster. Because the reed is wider it is necessarily thicker which can cause unevenness in rows. I’ve made these baskets with a “simple-weave”, over/under, over/under, etc. and I like the simplicity of using just the natural and a single color which creates a checkerboard pattern.

I am also using legs or ‘feet’. This creates other possibilities for use. These baskets have a less traditional look as opposed to a wool gathering floor basket with feet, which has a country feel to them.

I hand-dyed all the reed used in these baskets and really like how they turned out. Will have to make more!

Combining Styles

Japanese/Penland Style Basket

Japanese/Penland Style Basket

I haven’t posted anything in so long. I was invited to put my baskets in a consignment store in Bristol, TN. so I was very busy with preparing for that. I’m very excited about it and hope to sell some. I am also preparing for a craft fair in June and have been feverishly making more baskets for that!

This particular basket, shown above, is a combination of an old Japanese basket pinned on Pinterest and a basket made by Billy Ruth Sudduth. (I’ll be taking a class with her in July!) The Japanese style uses all ’round’ reed. I have used ‘rattan’ flat reed for the curls as does Sudduth but I added a handle and the basket is tall like the Japanese one.

It was not particularly hard to make but needed a lot of measuring and adjusting of the round reed spaces. There are 100 individual curls and each curl is inserted into each space. When the basic form of the basket was finished I gave it a dark Rosewood stain and the rim is a very light Rosewood.

The handle is made from reed strips and wrapped with a topknot to finish it off. I’m very pleased with it and hope you are too.

The Third Lid

Lg. Cat Head w/Lid

Lg. Cat Head w/Lid

Cat Head Basket w/Lid


IMG_0386I have finally finished the lid for this basket!  It was touch and go there for a while.  After throwing out the 1st lid, and giving up on the 2nd lid I was determined to make a lid and make it right.  Since I was making it without a pattern or anything else to study I found it to be ‘extreeemly’ difficult.

What I ended up with is an enclosed pyramid. With a flat top.  Or an upside down top!  Ha!  And, hey, I really like it.  But I won’t be doing another one anytime soon!

Just trying to explain this thing is difficult.  Like, does saying I put a base on the bottom and ended with a base on the top make any sense?  Let me know because that’s what I did.  After I found the finial for the top online, Ha!, I knew what I wanted the finished product to look like.  And so, this lid will forever be called “The Third  Lid”.  At least in my mind’s eye!

Let me know what you think.